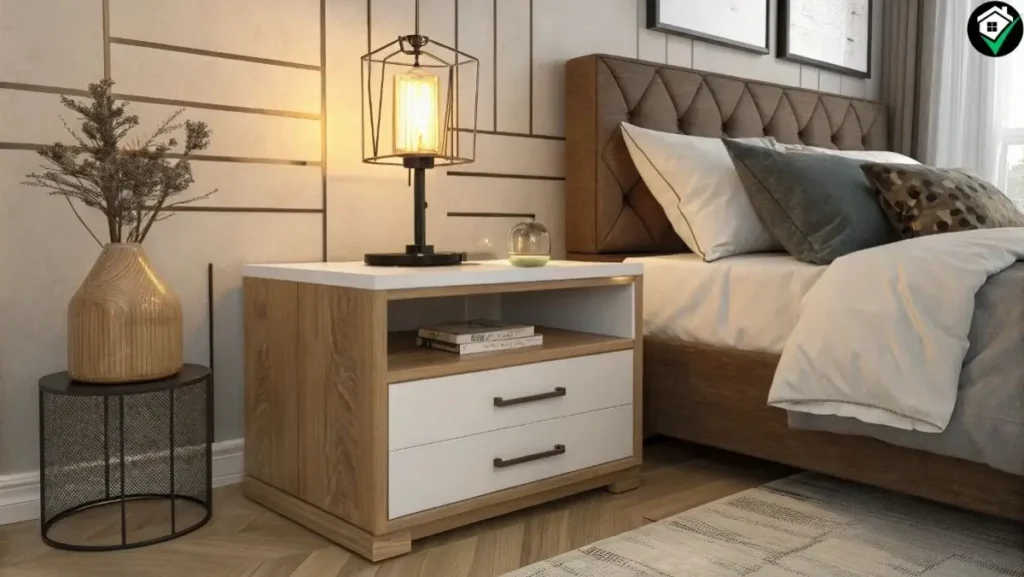
When you think of your bedroom, the nightstand plays a significant role in both the design and functionality of the space. Whether you need a spot to rest your books, your alarm clock, or simply a stylish piece of furniture to complement your bed, a DIY nightstand can be the perfect solution. Not only does making your own nightstand give you a chance to express your personal style, but it also saves you money and ensures a custom fit for your space. Ready to tackle this DIY project? Let’s dive into how you can build a beautiful and functional nightstand that suits your style!
Why Make a DIY Nightstand?
Building a DIY nightstand offers several compelling reasons. Perhaps the most obvious is the cost savings. Ready-made nightstands can be pricey, especially if you’re looking for something unique or custom-designed. But when you make your own, you have the flexibility to choose the materials, design, and finishes that align with your bedroom’s decor, all while keeping the budget in check.
Aside from the financial benefit, DIY projects can help you develop your craftsmanship skills. You’ll also gain a sense of satisfaction from creating something with your hands. Plus, a DIY nightstand allows you to incorporate specific features or unique touches that pre-built furniture simply can’t match. Whether it’s adding a charging station, customizing the size, or adding storage solutions, the possibilities are endless when you decide to build your own.
Materials and Tools You’ll Need for a DIY Nightstand
Before you get started, it’s important to gather all the necessary materials and tools for your nightstand project. Don’t worry, you don’t need to be an expert carpenter to pull this off. Below is a table outlining the basic materials you’ll need for most nightstand projects.
Materials Table:
| Material | Description |
| Wood | Pine, oak, or plywood are great options for a sturdy yet easy-to-work-with base. You can even consider reclaimed wood for a rustic feel. |
| Nails/Screws | Used to assemble your nightstand and secure all the parts. Ensure you choose the right length and thickness for your build. |
| Paint/Finish | This can be used to match your room’s decor. Choose a wood stain or paint finish based on your preferred look. |
| Wood Glue | For extra stability, especially in joints and edges. |
| Sandpaper | For smoothing out rough edges and surfaces, giving your nightstand a professional finish. |
| Drawer Pulls | These are optional but essential if you plan on adding drawers. |
| Power Drill | Essential for drilling pilot holes and installing screws. |
| Saw | A circular saw or miter saw will work best for cutting wood to the desired lengths. Alternatively, you can use pre-cut wood for a simpler project. |
Essential Tools:
- Drill for precise holes.
- Saw for cutting wood to the correct dimensions.
- Hammer for assembly if you are using nails.
- Measuring tape to ensure accurate measurements.
- Level for ensuring that everything is perfectly aligned.
If you want to go the extra mile, a sander will make the finishing process faster, giving you a smoother surface.
Step-by-Step DIY Nightstand Project (Beginner to Advanced)
Now that you have your materials and tools, it’s time to get started. The great thing about building your own nightstand is that you can choose a design that fits your skill level and available time. We’ll walk you through three different projects: one for beginners, one for intermediate builders, and one for those who are ready to take on a more advanced challenge.
4.1 Simple Pallet Nightstand (Beginner-Friendly)
If you’re new to DIY projects, building a nightstand from reclaimed pallets is a great starting point. This project is quick, budget-friendly, and adds a rustic touch to any room.
Materials:
- 2-3 wooden pallets
- Screws and nails
- Wood glue
- Sandpaper
- Paint or wood finish (optional)
Step-by-Step Instructions:
- Prepare the Pallets: Start by disassembling the pallets (or you can use whole ones depending on your design). Remove nails and sand down any rough surfaces.
- Assemble the Base: Lay out two pallets side by side and screw them together. This will form the main surface of your nightstand.
- Create Legs or Shelf: If you prefer a taller look, consider adding wooden legs (either purchased or DIY) by screwing them into the bottom of the pallet. Alternatively, add another pallet layer for more storage space underneath.
- Finish the Piece: Sand everything smooth and finish with paint or a wood stain of your choice.
Tips:
- For an even more rustic vibe, leave the wood unpainted and let the natural grain show.
- Use a pallet jack to avoid injury while working with heavy pallets.
4.2 Modern Minimalist Nightstand (Intermediate)
For a sleek and modern look, you can create a minimalist nightstand that works perfectly in contemporary bedrooms.
Materials:
- Plywood (cut to your preferred dimensions)
- Nails, screws
- Wood glue
- Paint (optional)
Step-by-Step Instructions:
- Cut the Plywood: Measure and cut your plywood to create the top, bottom, and sides of the nightstand. A simple rectangular shape works well for this design.
- Assemble the Frame: Attach the sides to the bottom panel using screws and wood glue for additional strength.
- Attach the Top: Secure the top piece of plywood using screws. Make sure everything is aligned and level.
- Add Legs: You can either buy pre-made legs or craft your own from wood or metal piping. Attach the legs to the corners of the nightstand.
- Finish and Paint: Sand the edges and apply a clean coat of paint in your chosen color.
Tips:
- Use matte or neutral-colored finishes for a modern, minimalist feel.
- Consider incorporating a small drawer or shelf underneath for added functionality.
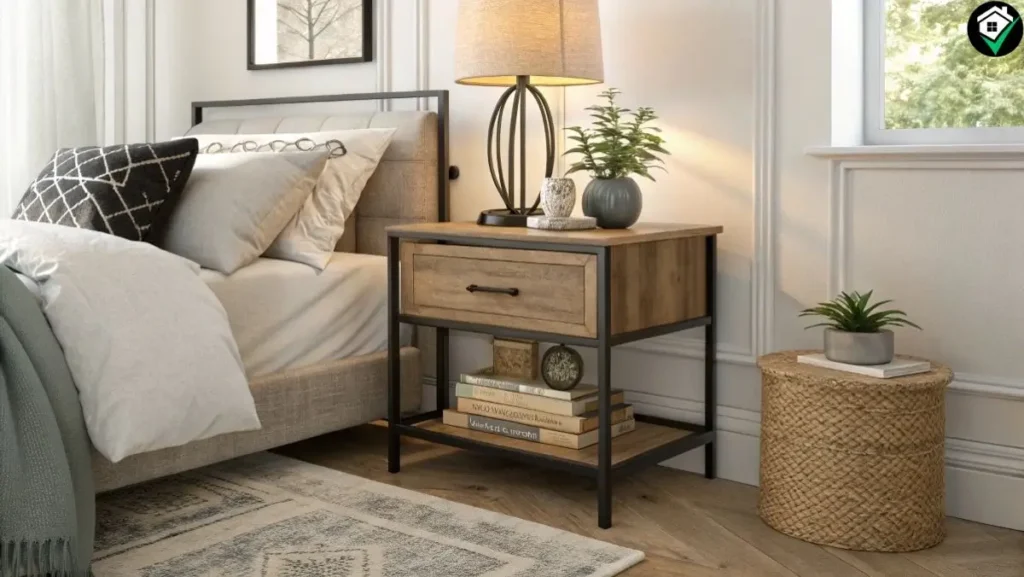
4.3 Industrial Metal and Wood Nightstand (Advanced)
Ready for a more challenging build? Try combining metal and wood for an industrial-style nightstand. This design is perfect for a bold, urban bedroom vibe.
Materials:
- Wood planks
- Metal pipes (or metal legs)
- Screws
- Wood finish
- Power tools (drill, saw)
Step-by-Step Instructions:
- Prepare the Wood: Cut your wood planks to size. These will form the surface and base of the nightstand.
- Build the Metal Frame: Assemble the metal pipes into a rectangular frame. You can use L-shaped pipe connectors to attach the pipes securely.
- Attach the Wood: Once the metal frame is complete, position the wood planks on top and secure them with screws.
- Finish the Piece: Sand the wood and apply a finish to bring out its natural beauty. For the metal, use a rust-resistant paint or leave it in its raw form for a truly industrial look.
Tips:
- For a more polished finish, apply a protective layer of varnish to both the metal and wood to prevent wear and tear.
- If you want extra storage, you can add a lower shelf made of metal and wood for a practical yet stylish touch.
15 Creative DIY Nightstand Ideas
Now that you have some basic plans, here are 15 more creative DIY nightstand ideas to inspire your next project.
- Floating Nightstand: Install a floating nightstand to save space and create a clean, modern look.
- Upcycled Suitcase Nightstand: Use an old suitcase for a vintage-inspired design with plenty of storage.
- Repurposed Ladder Nightstand: An old ladder can become a stylish and functional nightstand with a little creativity.
- Basket Nightstand: Place a sturdy table top over baskets for a functional and chic storage solution.
- Concrete Nightstand: For a bold industrial look, create a nightstand out of concrete and wood.
- Drawer-less Nightstand: For a minimalist approach, use a simple tabletop with open shelving or baskets.
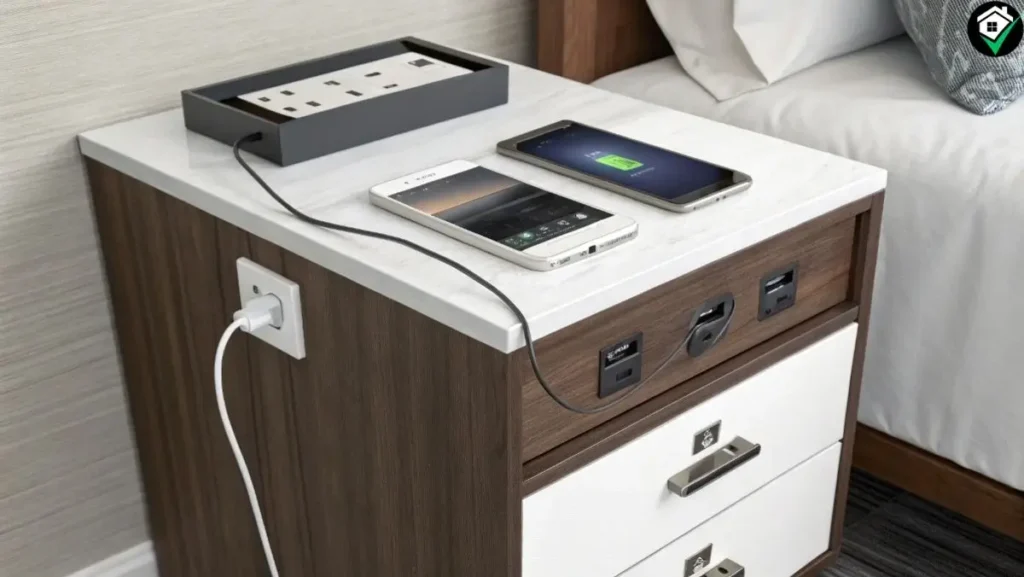
- Nightstand with Integrated Charging Station: Build a nightstand that incorporates a built-in charging station for all your devices.
- Modular Nightstand: Design a nightstand that can be rearranged or expanded to fit your changing needs.
- Wood Crate Nightstand: Stack wooden crates for an easy-to-make nightstand that offers ample storage.
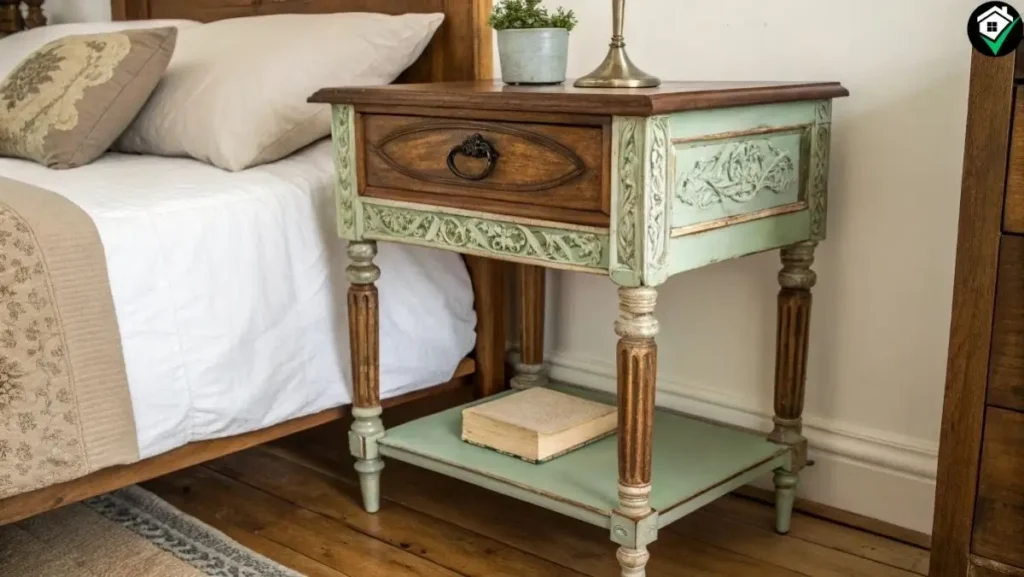
- Vintage Nightstand: Refurbish an old piece of furniture to create a timeless, classic nightstand.
- Multi-functional Nightstand: Add a pull-out tray, hidden compartments, or a small drawer for maximum functionality.
- Geometric Nightstand: Use geometric shapes and patterns for a fun, modern twist.
- Minimalist Floating Shelf: Install a floating shelf as a simple yet stylish alternative to a traditional nightstand.
- Rustic Wooden Box Nightstand: Use a large wooden box or trunk for a rustic, vintage-inspired piece.
- Nightstand with Built-in Lamp : Incorporate a lamp into your nightstand design for a cohesive, space-saving piece.
Tips for Making Your DIY Nightstand Stand Out
Adding personal touches to your nightstand is an easy way to elevate the overall look of your bedroom. Here are a few tips to help you achieve that perfect design:
- Color and Finish: Whether you opt for neutral tones, vibrant hues, or a natural wood finish, your nightstand should complement the rest of the room.
- Add Decorative Hardware: Consider changing the drawer pulls to unique designs or vintage knobs.
- Use Different Materials: Mixing materials like glass, marble, or metal can add a touch of luxury to your nightstand.
- Customize the Size: Adjust the height, width, or depth of the nightstand to suit your personal storage needs.
For more ideas on styling and creating the perfect atmosphere, visit expert advice from sources like Martha Stewart for timeless home decor tips. Additionally, check out The Spruce for inspiration on how to make your bedroom a haven with easy, DIY design tweaks. These trusted sites offer a wealth of practical ideas to help you achieve the nightstand design of your dreams.
Common Mistakes to Avoid When Building a DIY Nightstand
Even seasoned DIY-ers make mistakes. Here are some common mistakes you’ll want to avoid:
- Incorrect Measurements: Always measure twice, cut once. This ensures your pieces fit together perfectly.
- Skipping Sanding: If you skip sanding, your nightstand will end up rough and unprofessional. Take the time to smooth out all surfaces.
- Not Ensuring Stability: Make sure everything is securely fastened, especially the legs or frame, to prevent wobbling or tipping.
- Using Inappropriate Materials: Make sure the wood or other materials you choose are appropriate for the design. For instance, softer wood may not be the best for heavier, industrial designs.
FAQs About DIY Nightstands
1. What could be used as a nightstand?
A diy nightstand can be created from a variety of materials and repurposed items. Some common alternatives include wooden crates, vintage suitcases, small dressers, or even upcycled furniture like an old table or bookshelf. With a little creativity, almost anything can serve as a functional and stylish nightstand. The key is to make sure it’s sturdy enough to hold your essentials like a lamp, clock, and books.
2. What is the difference between a nightstand and a bedside table?
While the terms nightstand and bedside table are often used interchangeably, there can be subtle differences. A diy nightstand typically has a more structured design, often featuring storage like drawers or shelves, making it ideal for keeping personal items organized. On the other hand, a bedside table may be simpler in design, sometimes just a flat surface or with minimal storage. Both serve the same primary function – providing a place to store essentials next to the bed – but nightstands tend to have a bit more storage functionality.
3. Should nightstands be higher or lower than mattresses?
When designing your diy nightstand, the ideal height is typically level with your mattress or slightly lower. The key is to ensure the nightstand is easily accessible from your bed. If it’s too high, you may find it awkward to reach items, and if it’s too low, it can make accessing your items uncomfortable. Most nightstands are around 24-30 inches tall, but it’s important to adjust the height based on your specific bed’s dimensions.
4. Do you have to have 2 nightstands in a bedroom?
While it’s not a requirement to have two nightstands, it’s often a practical choice, especially in a diy nightstand design for a symmetrical look. Two nightstands are commonly used in larger bedrooms with a king-size or queen-size bed to ensure each person has their own space for personal items. However, if you’re working with a smaller space or a minimalist design, one nightstand can suffice. Ultimately, the number of nightstands depends on your bedroom layout, needs, and aesthetic preferences.
Certainly! Here is the “Variations and Customization Ideas” section with the subheading “Final Thoughts: How to Make Your DIY Nightstand Shine”, written to meet the required word count and SEO guidelines:
Variations and Customization Ideas
When designing your diy nightstand, there’s plenty of room for customization, allowing you to create a piece that reflects your unique taste and perfectly complements your bedroom. Here are some ideas to inspire your next project:
1. Add Drawers for Extra Storage

If you’re looking for more functionality, consider incorporating drawers into your diy nightstand. Not only do they provide hidden storage for smaller items like remotes, books, or journals, but they also help maintain a clean, organized look. You can add a single drawer for a minimalist design or multiple drawers for additional storage space. Don’t forget to choose drawer pulls that match your style—whether sleek and modern or vintage-inspired.
2. Incorporate a Built-In Lamp

For an extra touch of convenience and style, why not include a built-in lamp in your diy nightstand design? This can help you save space on your nightstand while ensuring that you have easy access to light. You could install a simple light fixture under a shelf or on top of the nightstand. Alternatively, opt for a design that features a lamp integrated into the structure, perfect for reading at night or creating a cozy ambiance.
3. Create a Charging Station

Incorporating a charging station into your diy nightstand is a fantastic way to keep your devices organized and accessible. Add built-in outlets or USB ports inside the drawer or on the back of the nightstand for a sleek, hidden solution. This is especially helpful in a modern bedroom where keeping electronics close by is essential. It’s a practical and stylish upgrade that will elevate your nightstand’s functionality.
4. Repurpose Vintage Furniture

For a unique, one-of-a-kind look, consider repurposing vintage furniture or using reclaimed wood for your diy nightstand. This is a great way to add character and history to your room. Look for old tables, dressers, or even doors that can be transformed into a stylish nightstand. The charm of upcycled furniture gives your nightstand a personal touch and a sustainable appeal. If you’re looking to enhance your home decor further, check out our How to Choose Houseplant: Cat-Safe Plants for a Pet-Friendly Home guide for great ideas on making your space both stylish and pet-friendly. These small additions can help you create a nightstand that fits seamlessly into your overall bedroom aesthetic.
Final Thoughts: How to Make Your DIY Nightstand Shine

Creating a diy nightstand allows you to inject your personal flair into your bedroom while being practical and budget-friendly. The beauty of a diy nightstand is that you can customize it to fit your style, needs, and space constraints. Whether you choose a simple pallet design for a rustic charm or opt for a sophisticated metal and wood combination for an industrial feel, the possibilities are endless.
As you design your diy nightstand, remember to balance form and function. Prioritize storage if your space requires it, but also make sure the design reflects the overall vibe of your room. Take the time to add custom features like drawers, charging stations, or even unique finishes that make your nightstand not just a piece of furniture, but an expression of your creativity.
By following these tips and incorporating your personal style, your diy nightstand will become an eye-catching, functional part of your bedroom for years to come.


1 thought on “15 Stunning DIY Nightstand Ideas You Can Build in a Weekend”